Light Painting Tools
Here is some very useful information for those interested in light sources for use in light painting the still life.
These are concepts that are taught and put into practice in my Light Painting The Still Life Foundation Course
I'll discuss all of the light sources I use for studio still life work (there are only a small handful)
First, though, I’d like to share my observations about the reasons I use light painting, as well as its advantages, and some basic (but valuable) observations about light and how I think about it when light painting:
Advantages of Light Painting:
1. Fine control of light is easier.
a. Easy to move lighting direction… just move your hand.
b. Compensate for dark areas or dark objects by adding more exposure (either increase light-painting time or increase ISO or brighten light source)
c. Affect color of local areas or certain objects by using a color adjustment layer in editing (very simple).
2. Color saturation is greatly increased due to smaller source, but given the ability to move the light around during the exposure, shadows are softened, so you get best saturation and texture without hard shadows!
3. Skimming the light adds a great amount of texture.
4. Dimension of objects is enhanced by independent control of lighting direction for each area of image.
5. The look and feel of light painting can be beautiful, can resemble painting or illustration.
6. Highlights can be placed exactly where you want them (something that painters do).
7. Big advantage in the studio: Open set, no need for multiple light sources, mirrors, reflectors, gobos, etc. Greatly simplifies and speeds up work. Easier to move around set, easier for others to get into set to make adjustments (food stylist, art director, prop stylist, assistant).
Basic principles of light as it relates to light painting:
1. Size of light directly affects softness, texture and color saturation:
a. Larger light is softer, flatter (less texture) and has less color saturation (i.e. overcast sky)
b. Smaller light source is harder (shadows and highlights have harder edges and transitions), more texture and has higher color saturation (i.e., the Sun).
2. Longer exposure to light = more brightness.
3. Distance of light to subject affects softness (closer light, softer light). Exposure is controlled by simple math.
4. Angle of light to subject affects brightness (more acute angle = less brightness)
5. Angle of light to subject GREATLY affects texture and dimension, light from camera direction is flat (little or no shadow), light from sides and rear of subject is more dimensional. Raking the light (very low light angle to surface) greatly increases texture.
6. Moving light in time exposure increases its effective size (and therefore softness). It also controls size and shape of specular highlights!
*****
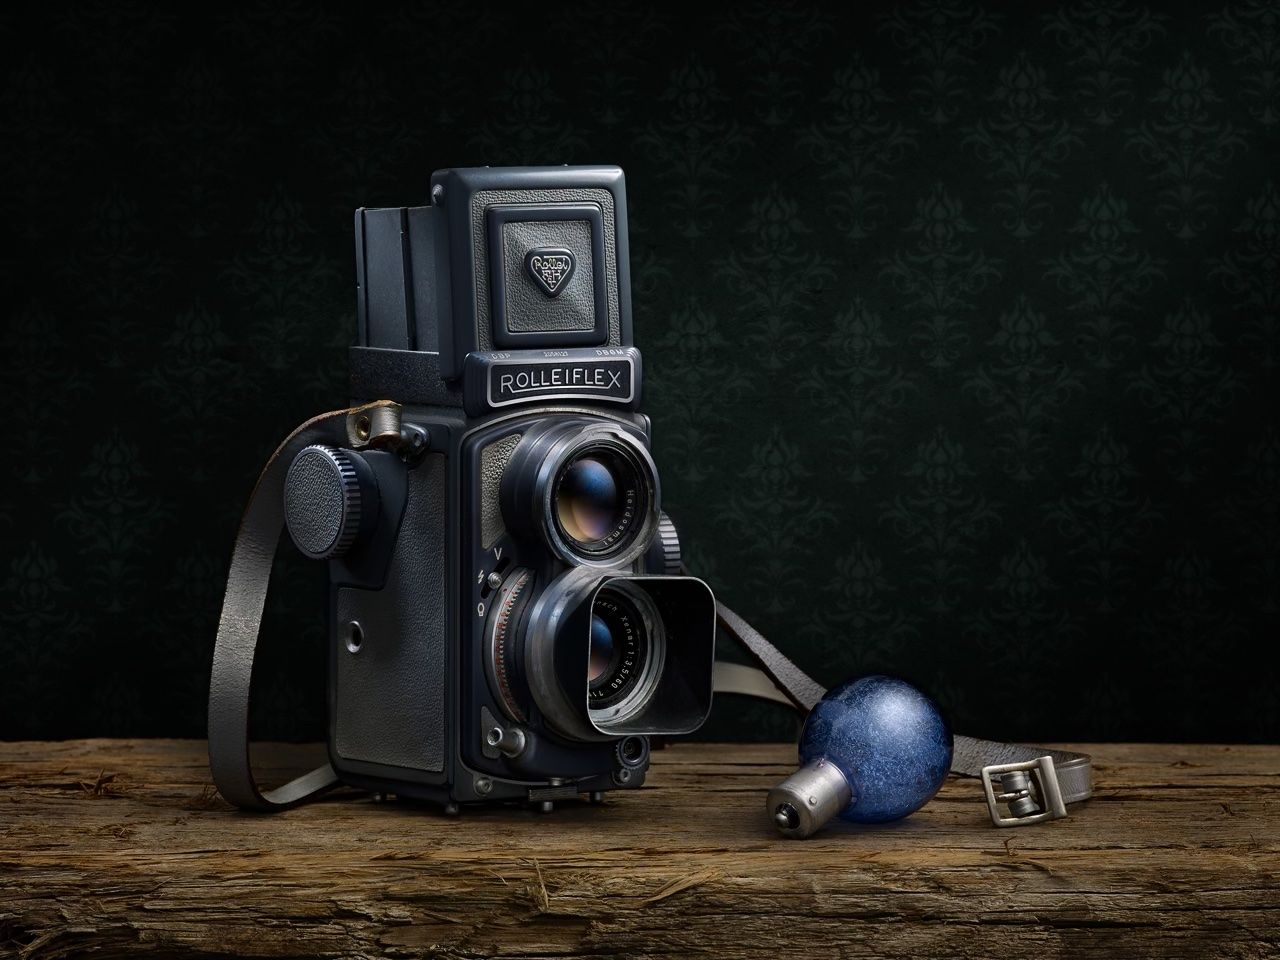
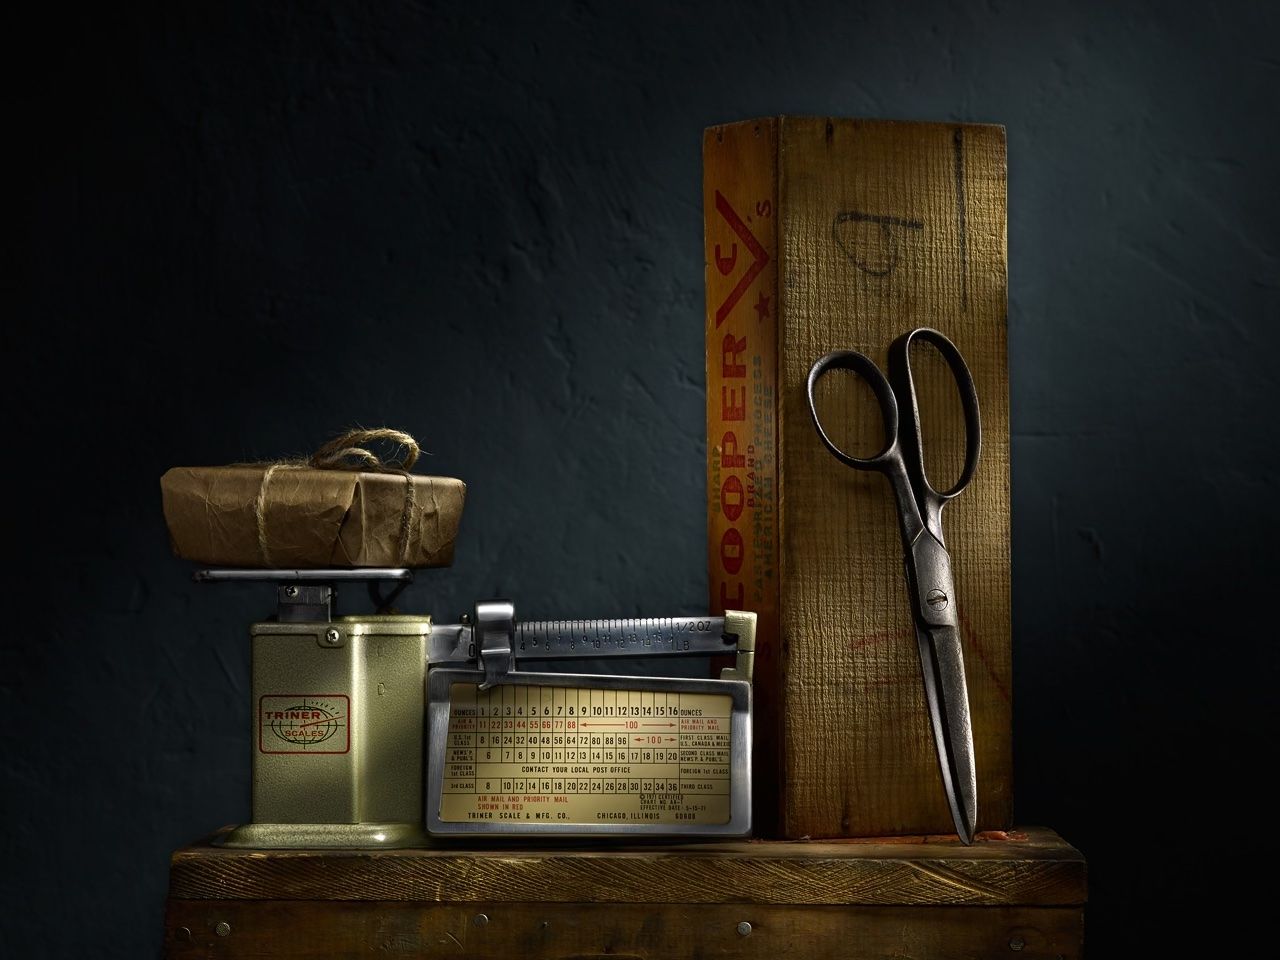
OK, so now let’s look at the actual light sources I use (and you can use) in light painting. After each description is a photo of the source and an image that was shot with that particular source as the main light.
In general, the size of the subject determines the size of the light source. This isn’t really a logistical thing, but an aesthetic one.
We don’t choose a larger source for larger subjects because of practical considerations, such as more light coverage or brightness, but for the sake of the relative softness of light (remember, bigger light, softer light). Think about this in terms of relative size, so if we are shooting a golf ball, a 5″x5″ is, when placed very close (say 5″) to the ball, a very “large” source.
If we move it 20 feet away, the same light source becomes very small indeed. The larger the source, the “softer” the light source is, with softer shadow to highlight transitions, and smoother texture. Now, If we are a basketball, that 5″ light source, placed at the same relative distance from it (5″ from the golf ball would be the same as about 30″ from the basketball), is not so large anymore.
To have a similarly sized (and soft) light source for the basketball, the source would have to be, say, 3 feet x 3 feet in size.
So, how does light painting help us? By moving the light over time (and space) we can create a larger light “source” than the actual physical one. A 5″ x 5″ panel, when moved around, can easily be a 24″x24″ light source.
Even a point light source, like a flashlight, can be moved in a way that the shadows and transitions are smooth and soft, yet the texture yielded from this type of source can be great!
That said, It takes a lot of experience to use an un-diffused flashlight, so using the diffusers are the way to go.
Here is some of my favorite equipment for light painting…
The short story… to do light painting at a very high level, you only need:
• A flashlight
• A diffuser for the flashlight
• An LED panel
• A diffusion scrim (large panel) which will be used with anLED panel
• A Light Wand (optional but great to have)
Flashlight For Light Painting
I now recommend this flashlight (which fits our adapter), the O Light Baton 4 PRO , please search the web for the best price (these may also available on websites other than Amazon, such as the Olight Website and B&H)
This is just one purchase source. If the link shows the flashlight is unavailable, just search for the light and find another seller. We try to keep up, but links and sellers are changing offerings constantly.
By the way, I simply leave my flashlight on the charger all of the time, so its ready to go!
These lights are great for light painting for the following reasons:
The size is ideal for our still life work.
Rechargeable battery has a long life.
The quality of the LED is very high.
The brightness ranges are ideal for light painting the still life.
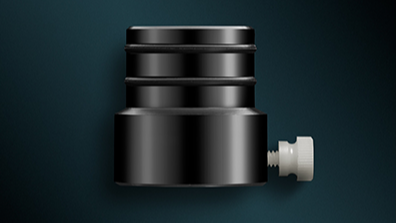
Anodized Aluminum Adapter
We offer an anodized aluminum adapter in .9″, designed specifically for this light, or any light with a .9 inch bezel, and we highly recommend it.
This adapter allows quick and easy fitting of the Light Diffusers (below) that I designed for light painting.
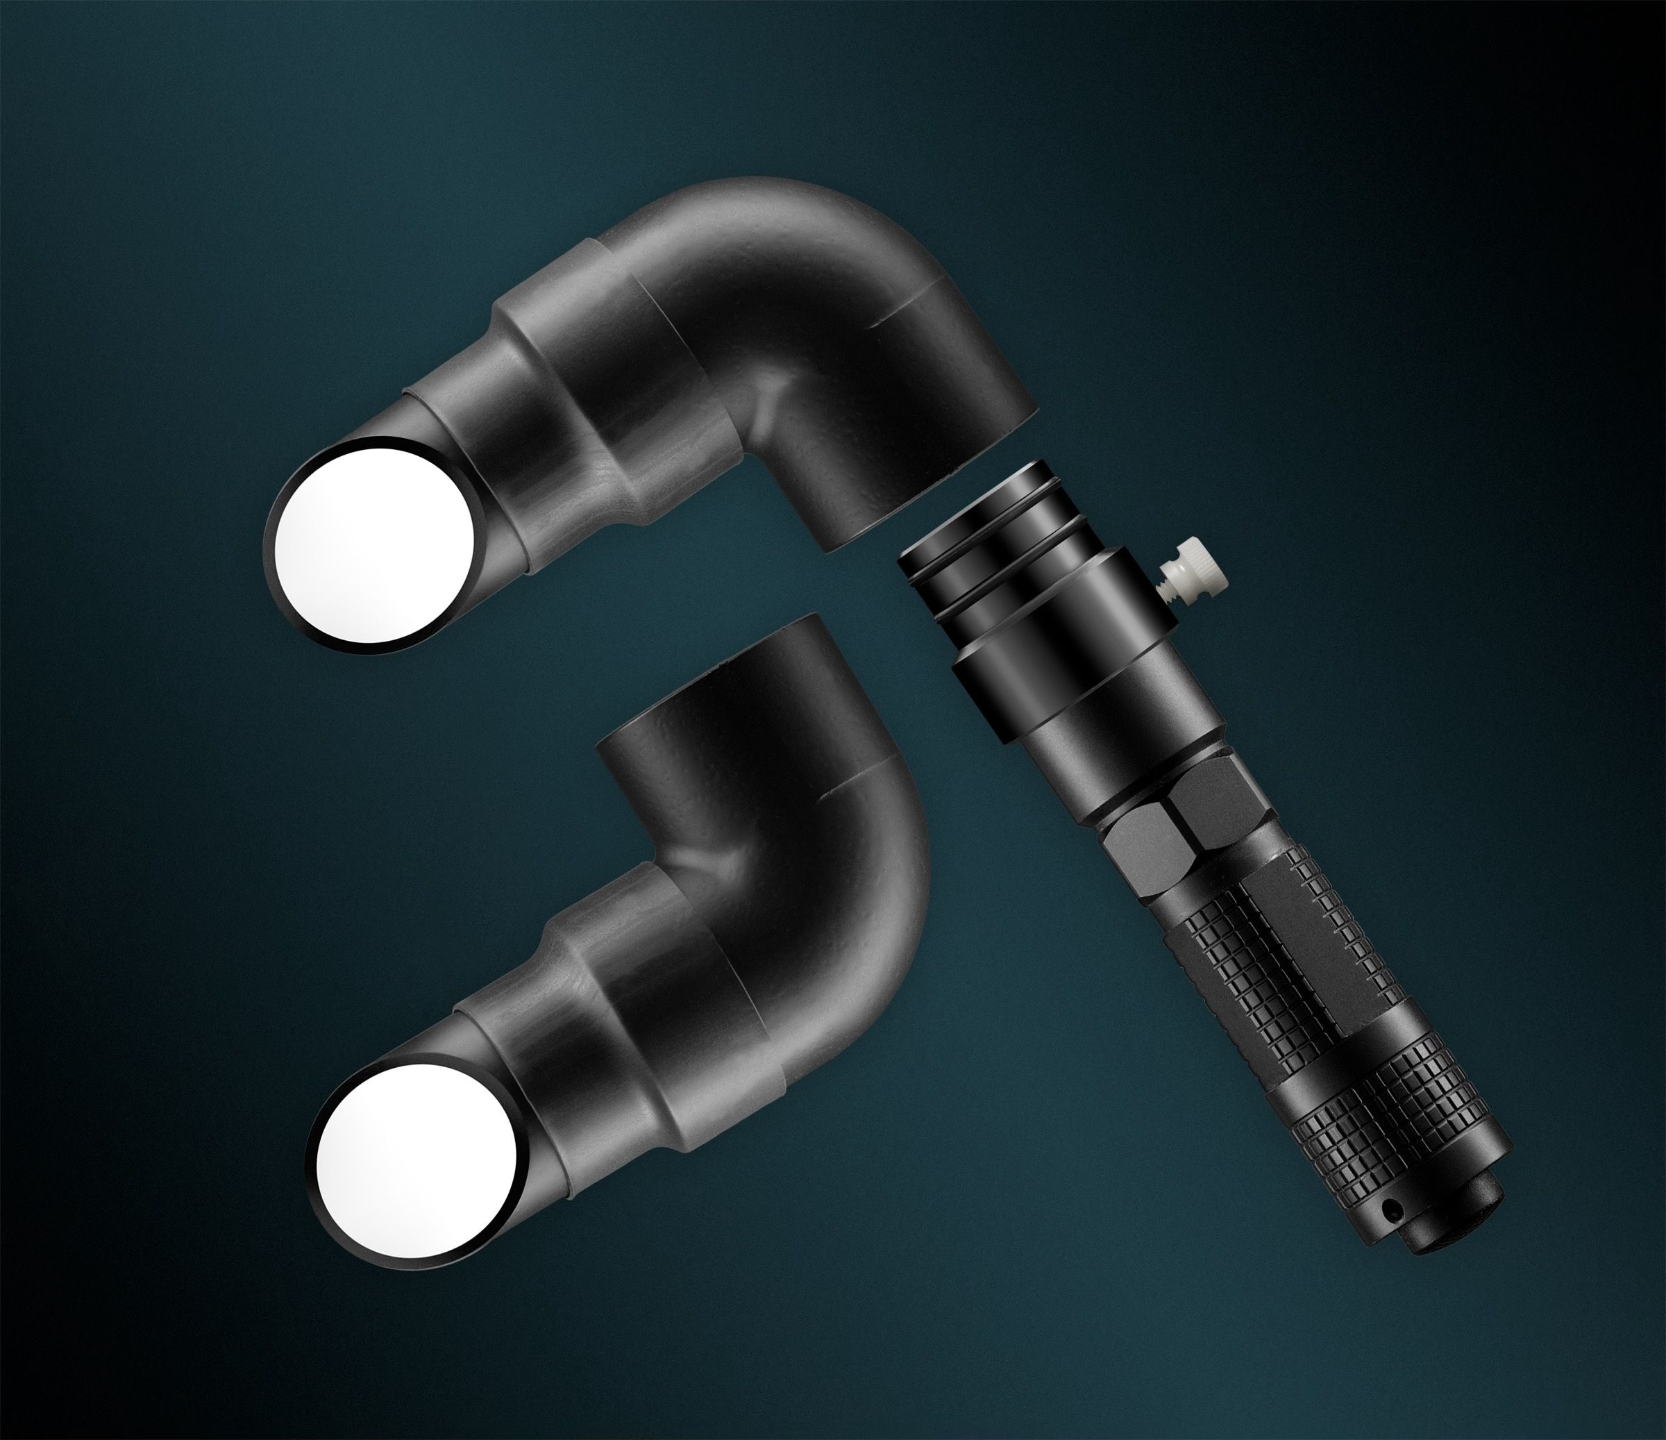
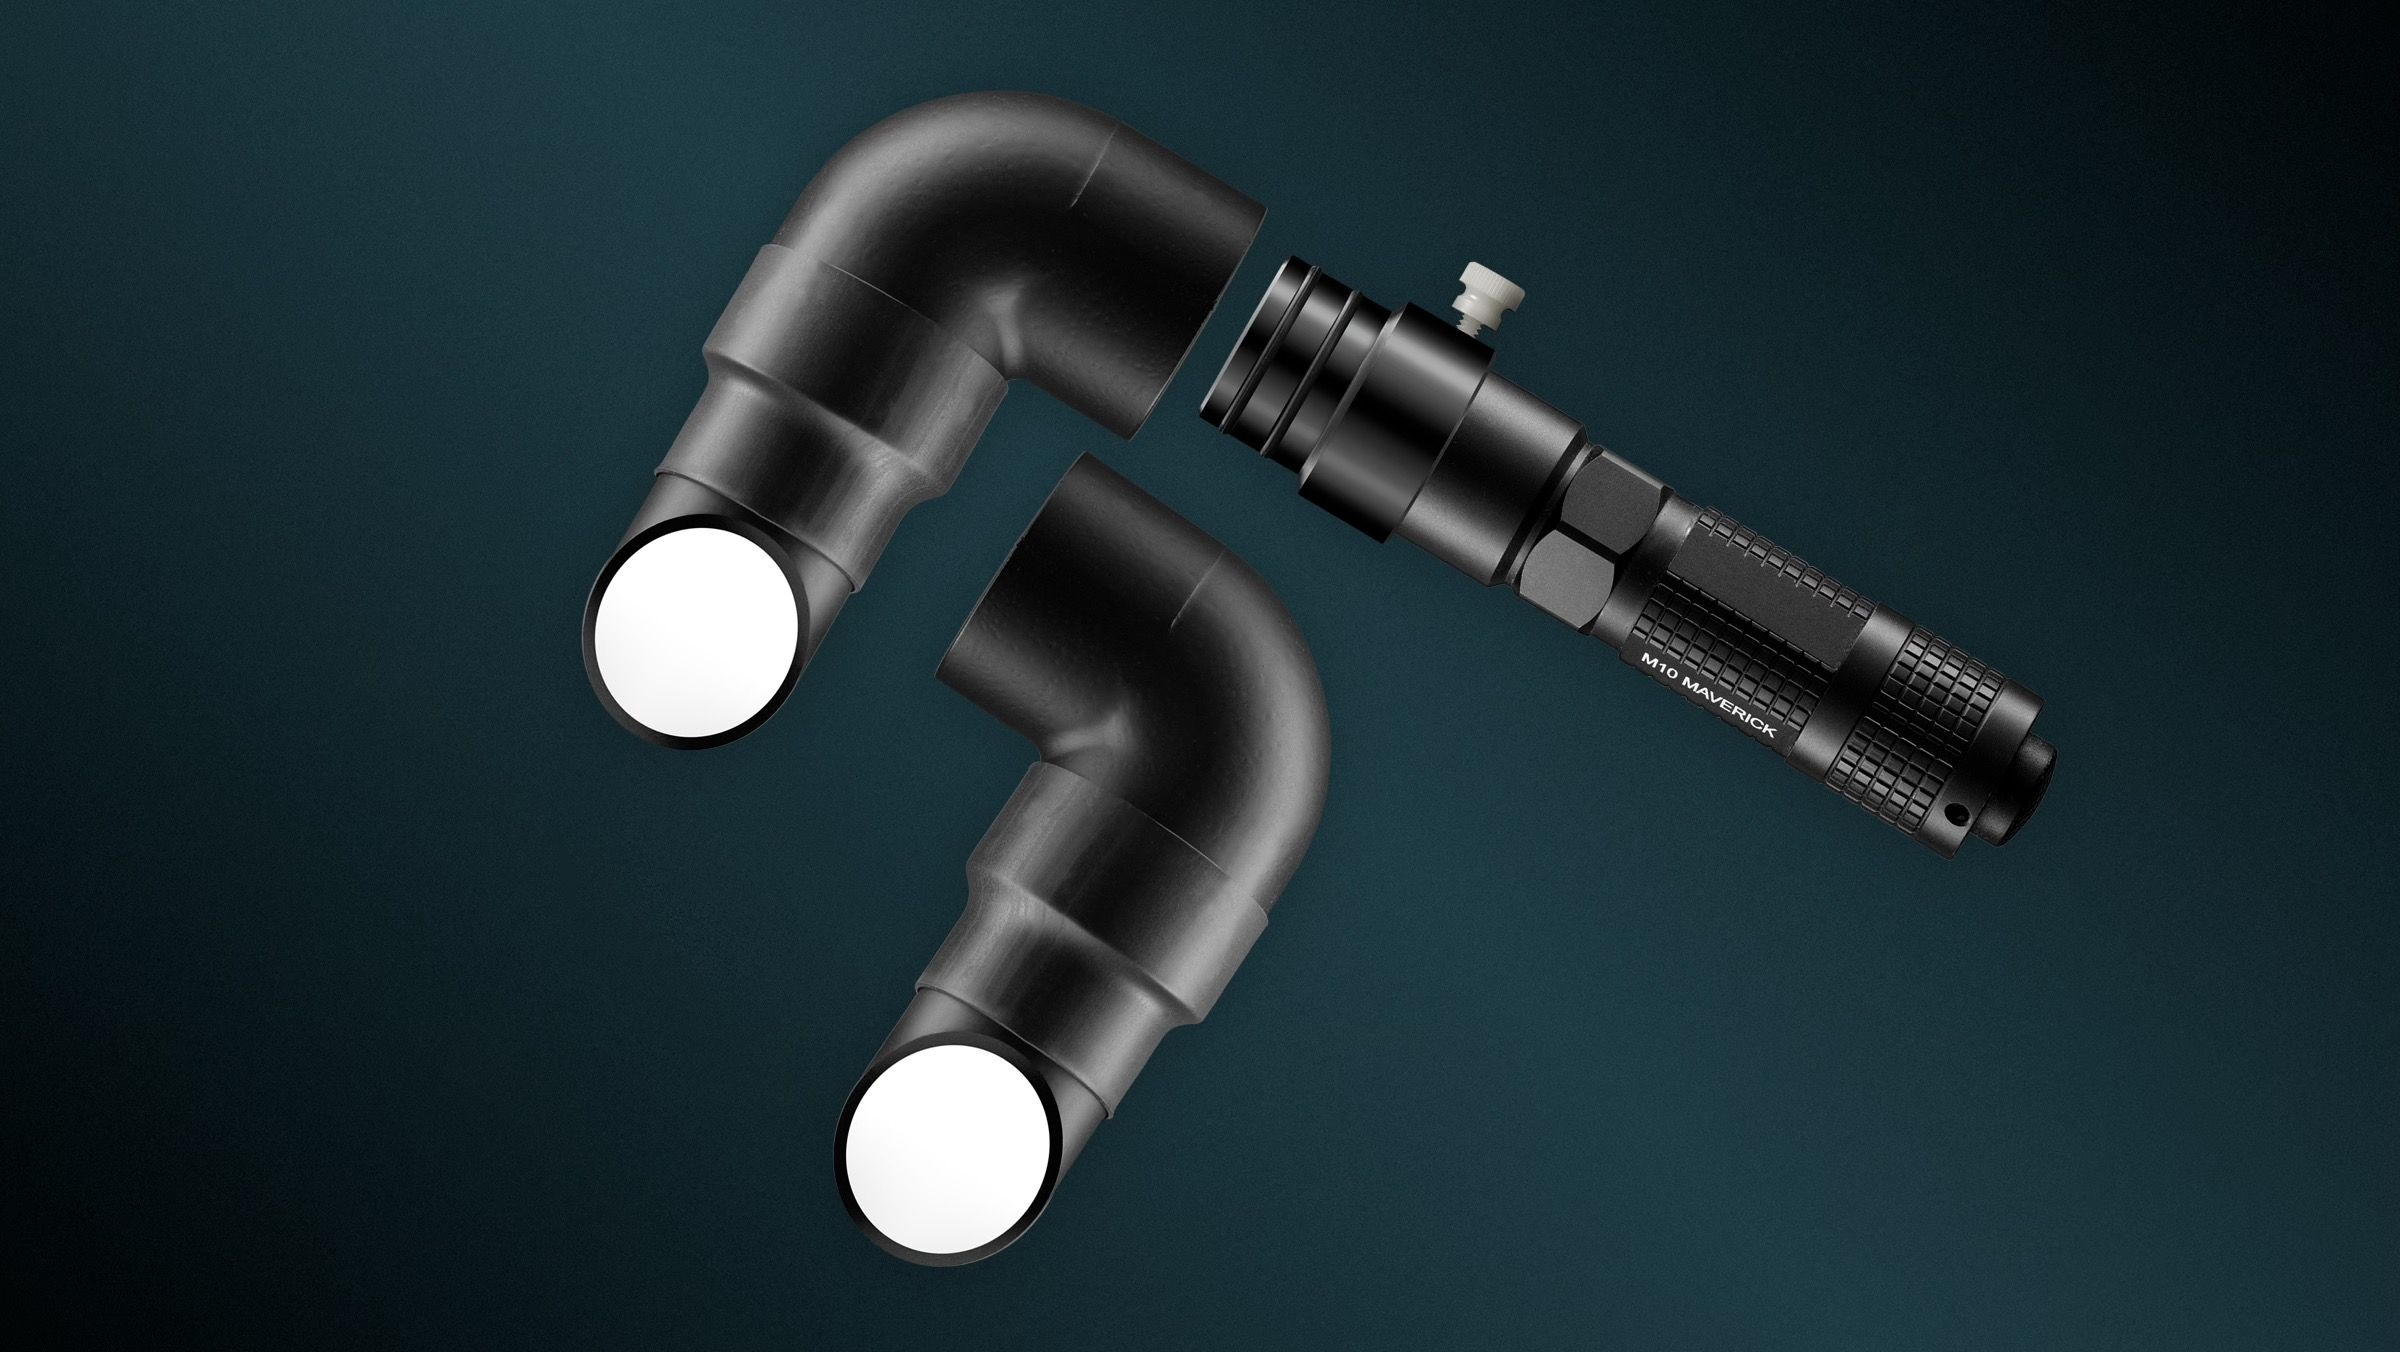
PVC Adapters of My Design
(patent pending)
I make these dimmer / diffuser attachments myself, and I coat the outside with 2 layers of a heavy opaque satin black coating.
The elbow does several things:
It dims and diffuses, but it also allows the photographer to get in very close due to the angle of the extension tube.
One hood has a “right hand” cut, and the other a “left hand” cut, allowing the flashlight itself to be in the handle-up or handle-down position, depending on the set.
This flexibility prevents us from bumping into items on the still life set.
Due to constant demand, I’ve decided to make these available for purchase in a set (set consists of both left and right angled hoods).
To purchase a set, visit our ETSY shop , or contact me
The beautifully made anodized aluminum adapter, which works perfectly with my diffusers, is also available on ETSY,
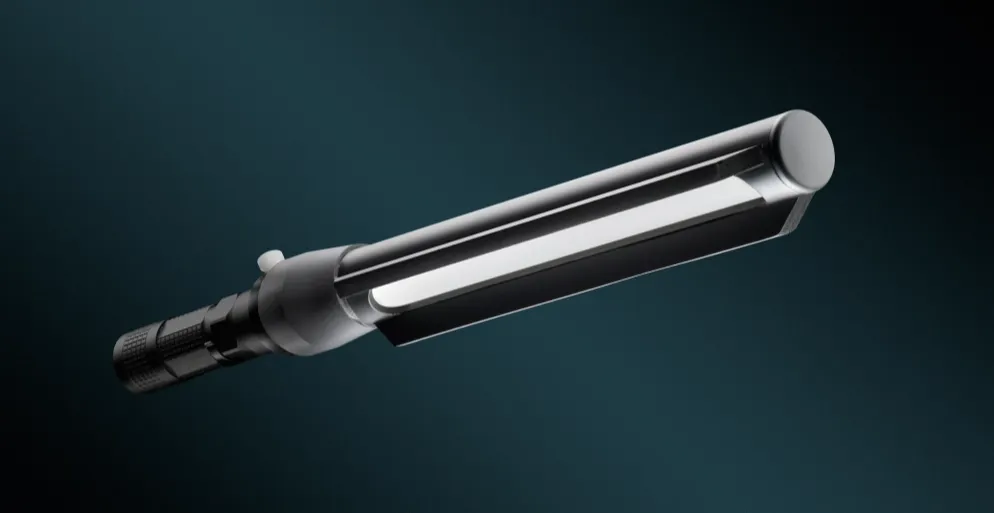
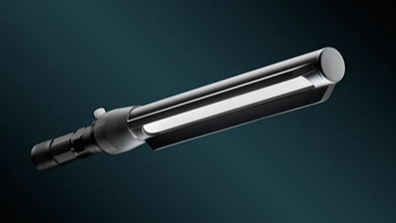
Harold Ross Lighting Wand
Our Light Wand is not a necessity, but a great addition to the equipment set, available on ETSY
The lighting wand is great for fill light, portraiture, reflective objects and highlights on longer and darker subjects.
Why Use The Diffusers?
The flashlight as a light source is too harsh unless diffused. The diffusers increase the size of the light, and therefore the softness.
The 1/8th” square LED (the light source itself) is increased to a 1″ diameter. This increases the softness tremendously! Also, the light is simply too bright to use without some dimming, as in light painting small objects, you must get in close, and you really want to have an exposure for each area you are lighting of at least 5-10 seconds.
An exposure of less than 5 seconds is too short to be able to think about where and how you are placing the light.
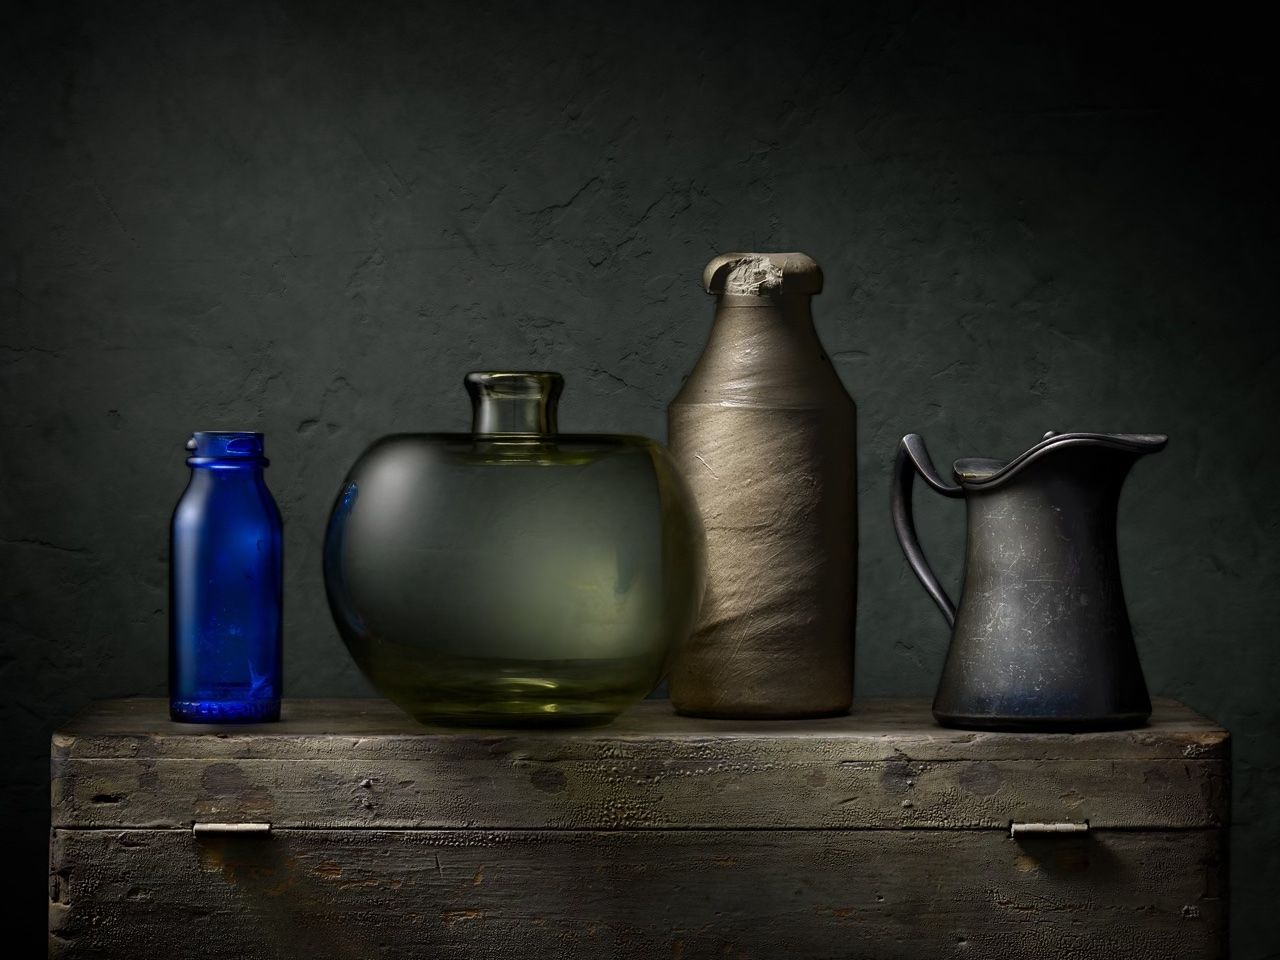
My image “Planer” (right) was lit solely with the LED flashlight (with no diffusion), using some available light as fill. Although possible, using the light without diffusion takes a good deal of experience, as the bare LED is quite bright and harsh.

Harold Ross Light Painting Tools Are Available From Our Etsy Store
25% off of my Lighting Tools ( up to 1 complete set for students of my Light Painting Online Video Course )
Things Change Constantly In The World of Tech.
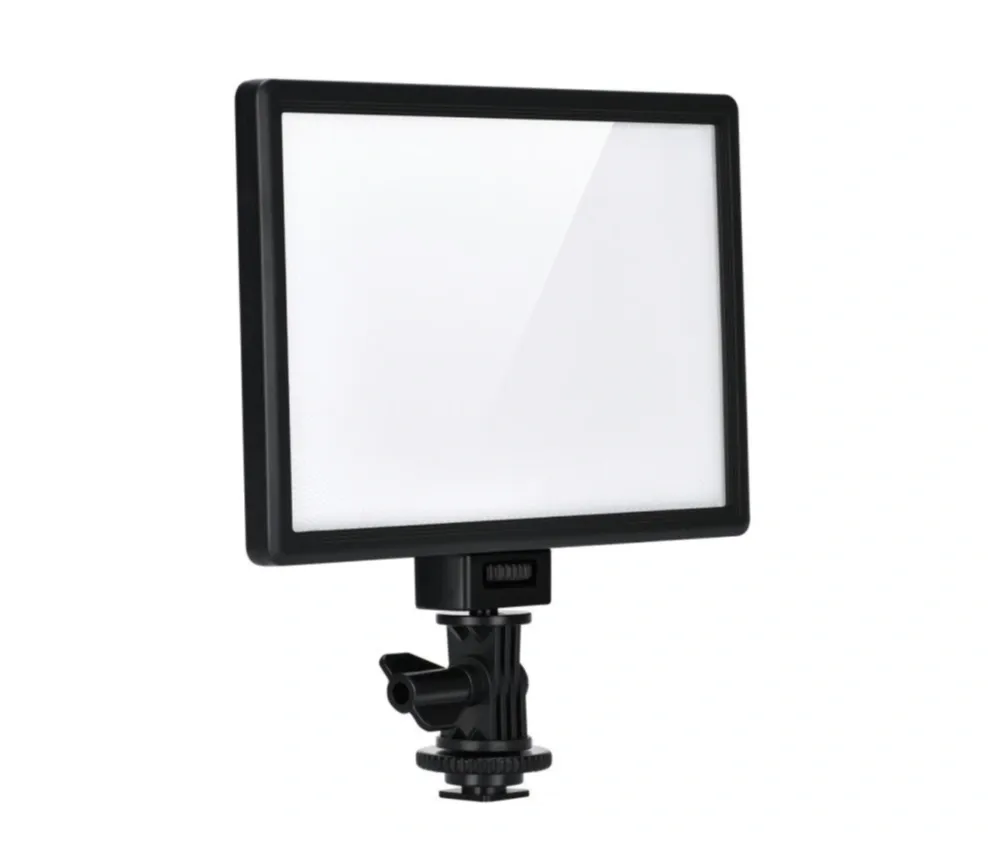
I now recommend this very nice LED panel, the Viltrox L116T, a high quality and low cost LED panel that has several advantages. It is electronically dimmable, and its color temperature can be changed (although I don’t recommend the use of that feature, as my workflow handles color balance differently), it is a perfect size, and it is very bright (I use it at its lowest setting!)
It is also very inexpensive. Just a few years ago, this panel might have cost $400! Now it is in the $35-$45 range. This panel is available with and without a battery and charger (as in the link above), but no matter which battery system you use, I would recommend getting an extra battery. I recommend these batteries with charger
This light is ideal for using with the Manfrotto Tri-Grip Scrim (below) for highly reflective objects, and also for a particular part of my workflow.
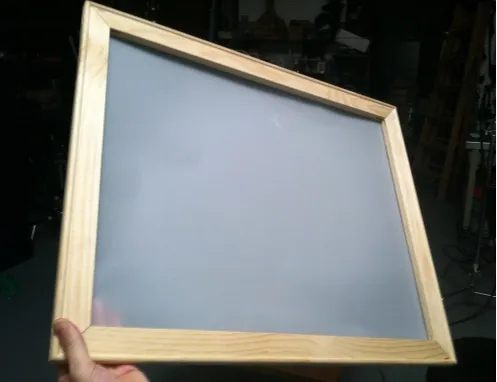
Home Made Scrim
I routinely use a very inexpensive diffusion panel called a “SCRIM”, A 24″x24″ (or so) canvas stretcher frame stretched with any kind of diffusion material (thin white shower curtain material, Rosco material is #116 Tough White Diffusion, rip stop nylon, etc.).
Even though you can make your own for a very low cost, it is a bit heavy and more difficult to hold. See the Tri-Grip Scrim below.
This light / scrim combination is perfect for glass and metal, as well as any highly reflective subject.
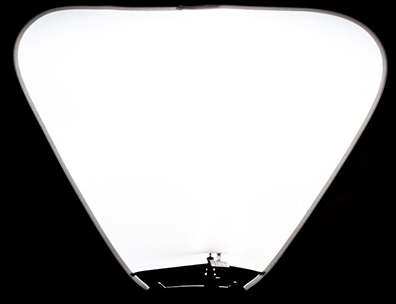
Tri-Grip 2 Stop Diffusion Panel
I now use (Thanks to Lisa Cuchara!) the Tri-Grip 2 stop diffusion panel
It is very similar in function to the home made panel, but it is much lighter and more portable.
I strongly recommend that you steam out the wrinkles and keep it unfolded, or you may see wrinkles in reflections in glass or metal!